
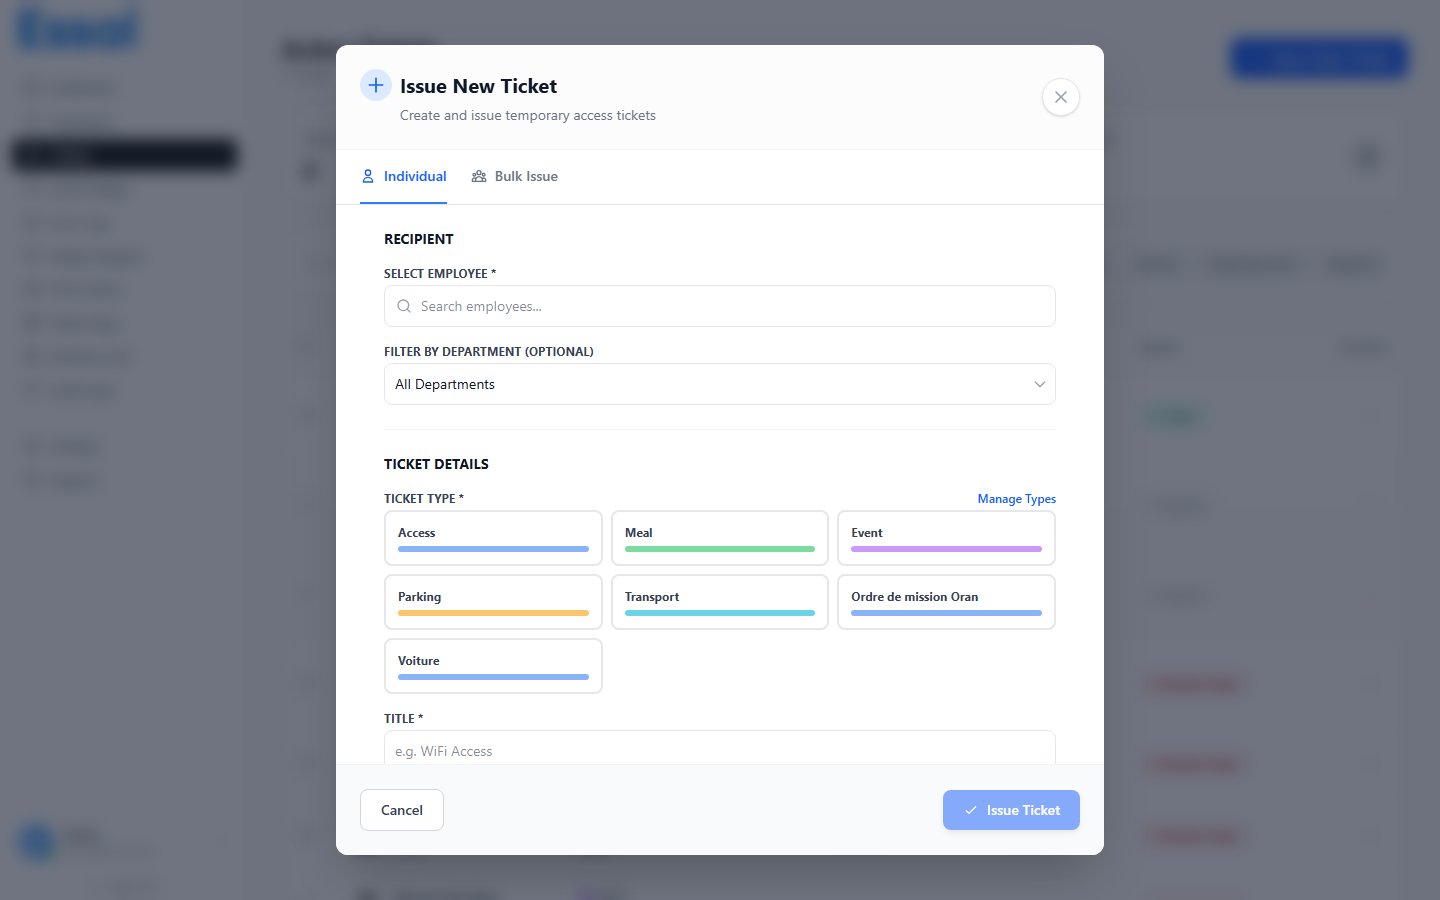
Opening the Create Modal
- Navigate to Tickets in the sidebar
- Click the New Ticket (or + Issue Ticket) button in the top-right corner
- The Create Ticket modal opens
Issuing to an Individual Employee
The modal opens in Individual mode by default.Step 1 — Select Recipient
- Type in the employee search field — results appear as a dropdown filtered to active employees only
- Optionally use the Filter by department dropdown to narrow the search to a specific department
- Click the employee’s name in the dropdown to select them
Step 2 — Select Ticket Type
Choose the ticket type by clicking one of the type cards. Each card shows the type’s color and name. The selected card is highlighted.Step 3 — Fill in Ticket Details
Step 4 — Issue
Click Issue Ticket to create the ticket. The modal closes and the ticket appears in the list.Issuing to an Entire Department (Bulk)
Switch to the Bulk tab at the top of the modal.- Select a department from the dropdown — the number of active employees is shown (e.g. “Engineering (12)”)
- Fill in the ticket details (same fields as individual — title, type, validity, etc.)
- Click Issue to Department
- A confirmation dialog shows the number of tickets that will be created — confirm to proceed
- One ticket with the same details is created for every active employee in the department simultaneously
Note: Employees with inactive, suspended, or terminated status are automatically excluded from bulk issue.
Ticket Never Expires
To issue a ticket with no expiry date, uncheck the Ticket expires checkbox. The validity field disappears and the ticket will remain active until manually revoked or deleted. The verification page will show “Never expires” in green.After Issuing
Once issued, you can:- Copy the ticket link via the three-dot menu — share it with the employee so they can access it on their phone
- View the ticket detail to confirm all fields are correct
- Revoke the ticket immediately if it was issued in error