
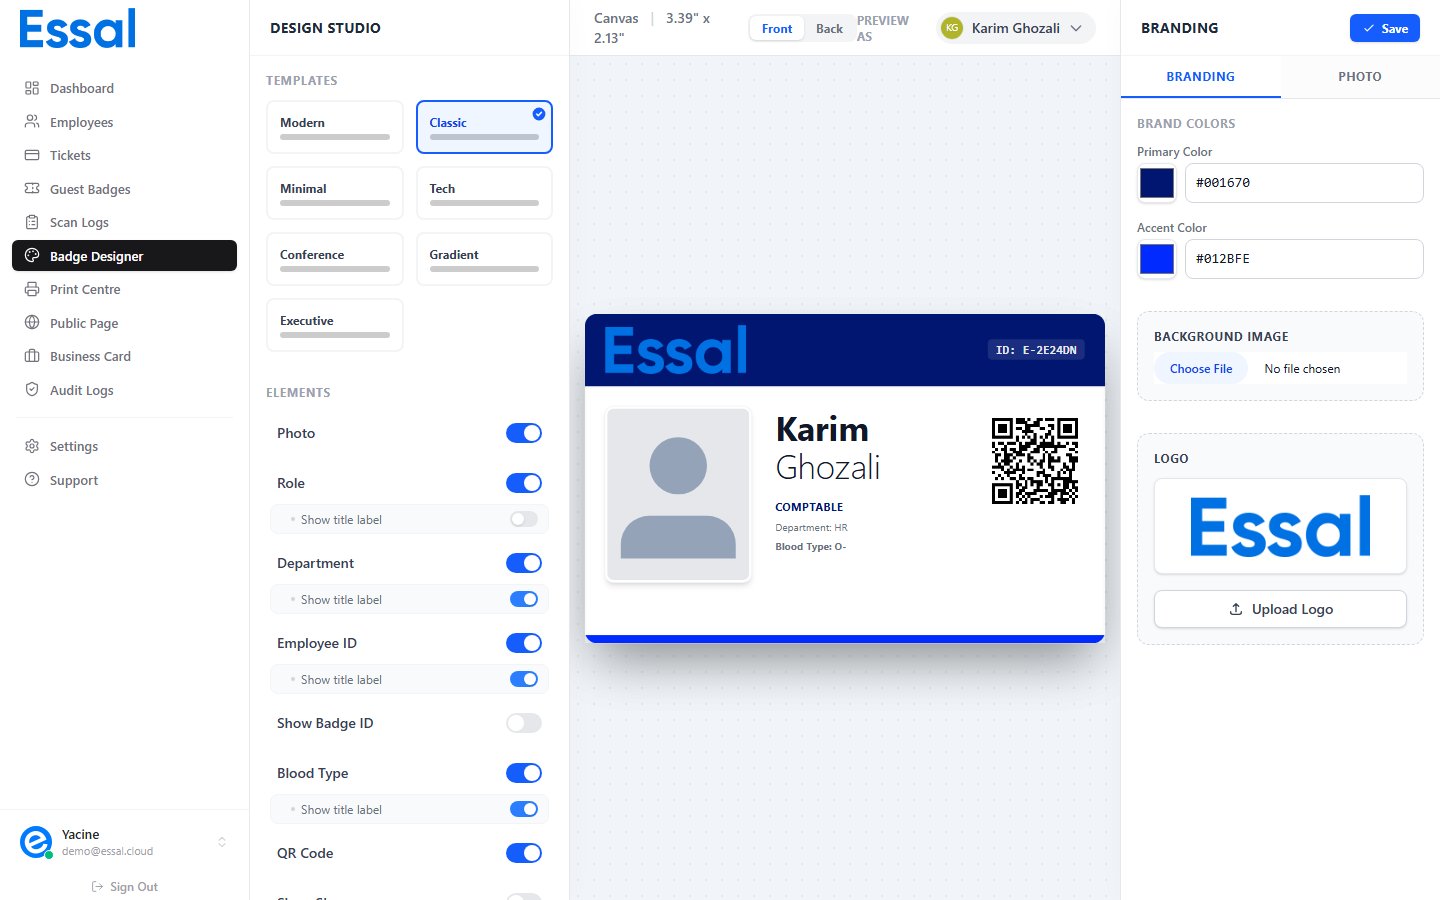
Available Front Fields
Nine fields can be toggled on or off. Each is a pill-shaped switch that turns blue when enabled.“Show title label” Sub-Toggles
Five fields have an optional “Show title label” sub-toggle that appears indented below the field when the field itself is enabled. Enabling it prepends the field name to the displayed value on the badge:
Labels improve clarity when multiple IDs appear on the same badge, or when the badge is used in a security context where field identification matters.
Field Rendering by Layout
Not every layout renders every field in the same position or the same way. The layout determines placement — toggling a field on means it will be shown wherever that layout places it.- Photo — displayed as a circle in all layouts; size varies (large in Modern and Conference, medium in Corporate and Minimal)
- QR Code — positioned in a corner or beside the photo; always has a white background for reliable scanning
- Logo — shown in the header, corner, or top area depending on the layout
- Role pill — some layouts render the role inside a colored pill (Modern, Conference, Corporate); others render it as plain text
- Blood Type — rendered as smaller text, typically below department or role
Recommended Combinations
Minimal badge (fastest to print, most readable at a glance):- Photo ✅ · Name (always shown) · Role ✅ · QR Code ✅ · Logo ✅
- Turn off: Department, Employee ID, Badge ID, Blood Type, Slogan
- All fields on, with labels enabled for Role, Department, Employee ID, Badge ID
- Photo ✅ · QR Code ✅ · Employee ID ✅ · Badge ID ✅ · Role ✅ · Department ✅
- Blood Type optional depending on your safety policy
- Photo ✅ · Role ✅ · Department or Company ✅ · QR Code ✅
- Turn off: Employee ID, Badge ID, Blood Type (not relevant for visitors)
Name Fields
The employee’s First Name and Last Name are always displayed on the badge — there is no toggle to hide the name. The name is the primary identifier and is part of every layout’s core structure.QR Code Behavior
The QR code on the badge links to the employee’s public verification profile atidpage.link/public/{badgeId}. The URL:
- Uses the employee’s most recently issued active badge ID
- Updates automatically when a new badge is issued to that employee
- The page it links to can be configured in Public Page Editor — see Configuring the Public Profile Page