
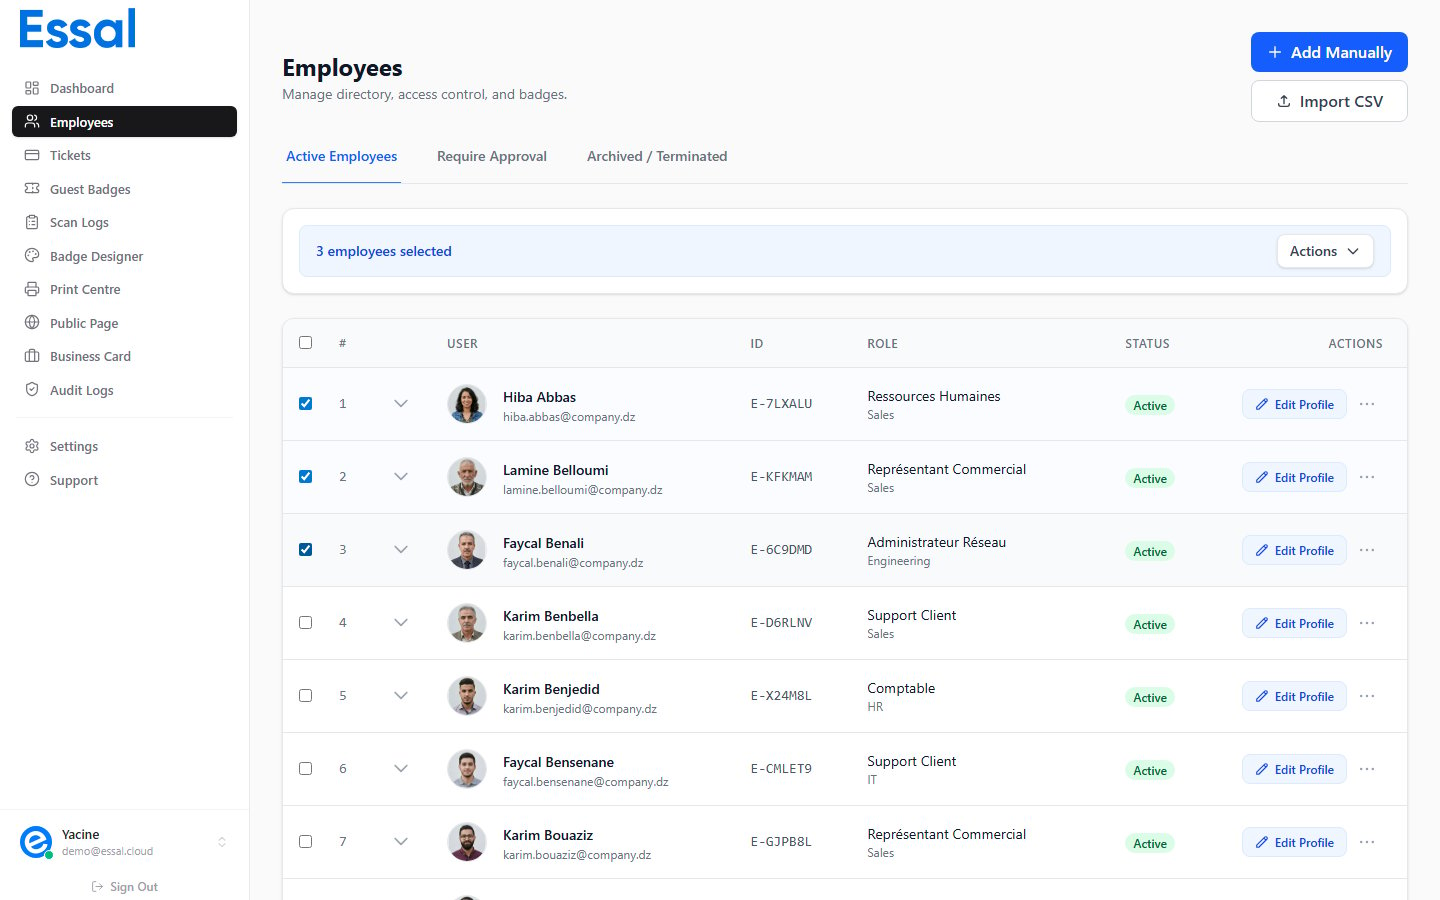
Selecting Employees
Each employee row has a checkbox on the far left. Click the checkbox to select that employee. Selected rows are highlighted with a blue tint.- Select one — click a single checkbox
- Select all on current page — click the checkbox in the column header
- Deselect all — click the header checkbox again, or press
Escapewhen no modal is open
Checkboxes and bulk actions are only available to Admin and Manager roles.
Opening the Batch Actions Menu
With at least one employee selected, a Batch Actions dropdown button appears in the selection bar. Click it to see the available operations.Available Batch Actions
Export CSV
Downloads a spreadsheet of all selected employees asemployees-export-YYYY-MM-DD.csv.
Exported columns:
- First Name
- Last Name
- Role
- Department
- Status
- Employee ID
Batch Approve
Visible only on the Require Approval tab. Sets all selectedpending employees to active in a single operation. Useful after bulk import when the approval workflow is enabled and you need to activate a batch of new employees at once.
Batch Deactivate
Sets all selected employees tosuspended status. Skips any employees who are already terminated.
Use this when multiple employees need their access temporarily paused — for example, during a site shutdown or a scheduled audit.
Suspended employees can be individually reactivated later from their row action menu.
Batch Mark Lost
Marks the active badge of each selected employee aslost and updates their status accordingly.
Use this in a security incident where multiple badges are believed to be compromised — for example, if a bag with multiple badge cards was stolen.
Each affected employee will need a badge reissued individually (use Reissue Badge from the row action menu).
Batch Delete
Admin role only. Permanently deletes all selected employee records. A confirmation dialog appears before the deletion proceeds.This action cannot be undone. All data for the deleted employees — badges, tickets, scan history references, and health records — is permanently removed. Use termination (not deletion) if you want to preserve historical records.
Combining Filters with Bulk Actions
For efficient bulk operations:- Use the Search, Status, and Department filters to narrow the list to the subset you want to act on
- Click the header checkbox to select all filtered results on the current page
- Open Batch Actions and choose the operation
- Set the Department filter to Engineering
- Click the header checkbox to select all
- Choose Export CSV
Clearing Selection
- Click the × Deselect button in the selection bar, or
- Press
Escapewhen the employee list is focused and no modal is open