
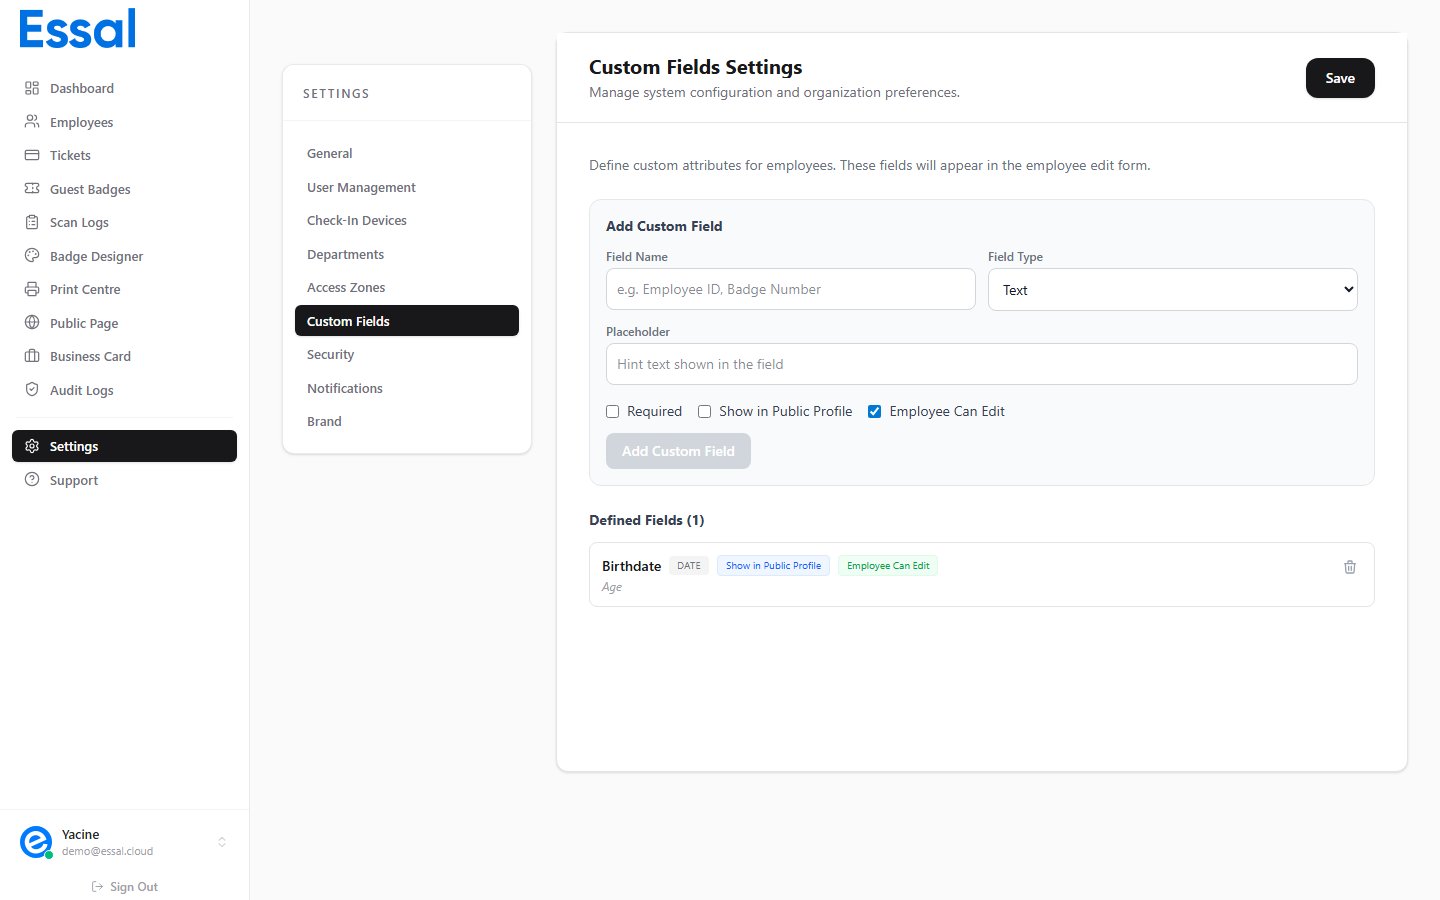
What Custom Fields Are For
The standard employee profile covers common fields (name, email, role, department, phone, etc.). Custom fields extend this with data specific to your organization, such as:- Employee number (if your HR system uses a different ID format)
- Floor or desk location
- Vehicle registration plate (for parking access)
- Uniform size
- Security clearance level
- Canteen meal plan type
Creating a Custom Field
- In the Custom Fields tab, find the New Custom Field form
- Set the Field Name — this is the label shown on the employee form (e.g. Desk Number, Security Level)
- Choose a Field Type (see options below)
- Configure the Options (for select fields — see below)
- Set any additional toggles (Required, Show on Badge, Show on Public Profile, Allow Employee Self-Edit)
- Click Add Field to save
Field Types
Select Field Options
For Select type fields, a list of allowed values must be defined:- Type each option in the Options text area, one per line
- The employee form will show a dropdown with exactly these options
- CSV imports must use one of the listed values exactly — other values cause a validation error
Field Configuration Options
Field Order
Custom fields appear in the order they were created. To reorder them, use the drag handle (if available) or delete and re-create them in the desired sequence.Editing a Custom Field
Click the Edit icon next to a custom field. You can change:- The field name
- The field type (note: changing type may affect existing data if values become incompatible)
- Options (for select type)
- All configuration toggles
Deleting a Custom Field
Click the Delete icon next to a field. This permanently removes:- The field definition
- All employee data stored in that field across every employee record
Deletion is irreversible. Export employee data before deleting a field if you need to preserve its values.