
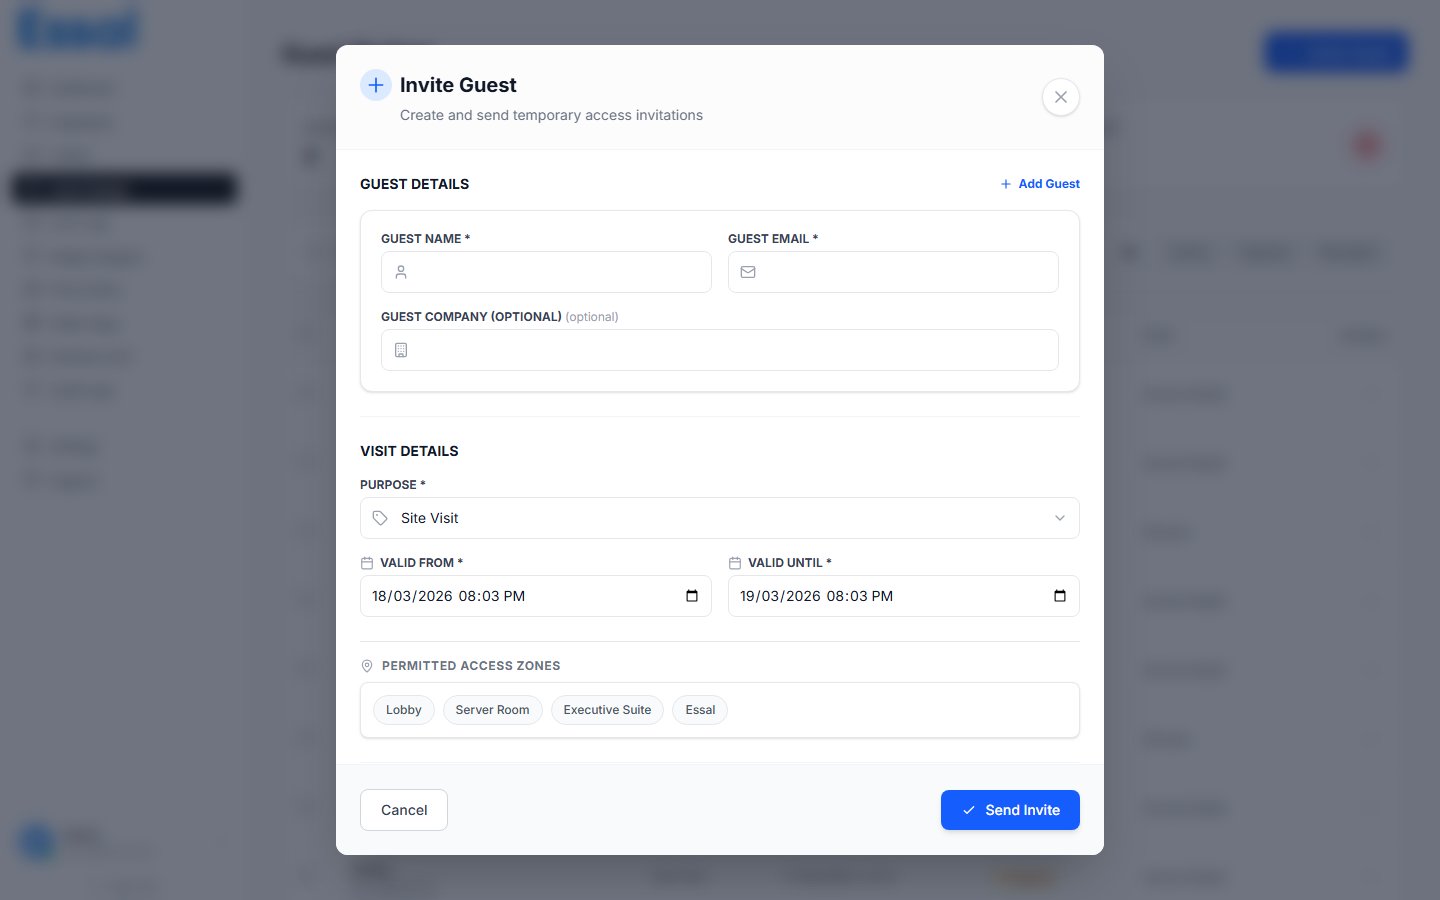
Opening the Create Modal
- Navigate to Guest Badges in the sidebar
- Click the New Guest Badge (or + Add) button in the top-right corner
- The Create Guest Badge modal opens
Step 1 — Guest Details
Enter the information for the person (or people) you are inviting.Inviting Multiple Guests at Once
You can create up to 10 guest badges in a single submission:- Fill in the first guest’s details
- Click Add Guest to add another row
- Repeat up to 10 guests
- Use the trash icon on any row to remove a guest
Step 2 — Visit Details
Define when the badge is valid and why the guest is visiting.Tip: If you select Other for Purpose, a free-text field appears so you can enter a custom reason.
Step 3 — Permitted Access Zones (Optional)
If your organization has defined access zones, a list of zone chips appears here. Click any zone to toggle it on or off. Only the selected zones will be shown on the guest’s verification page. This section is hidden if no zones have been configured.Step 4 — Address / Location (Optional)
Add a location entry to help the guest navigate to the right place. This is especially useful for large campuses or multi-building sites.- Address Name — a short label (e.g., “Main Entrance”, “Building B Reception”)
- Maps Link — a direct URL to Google Maps or any mapping service
- Click Search Google Maps to open a Maps search in a new tab and copy the link
Step 5 — Notes (Optional)
Use the Notes field for any additional instructions or context for the guest (e.g., “Please bring a photo ID”, “Parking available in Lot C”). Notes are stored in the badge record but are not displayed on the public verification page.Sending the Invite
Once all required fields are filled:- “Send Invite” — appears when you have entered one guest
- “Send N Invites” — appears when you have multiple guests in the list (N = count)
- Create badge records in the database for all guests
- Send each guest an email with their unique badge link
- Close the modal and refresh the Guest Badges list