
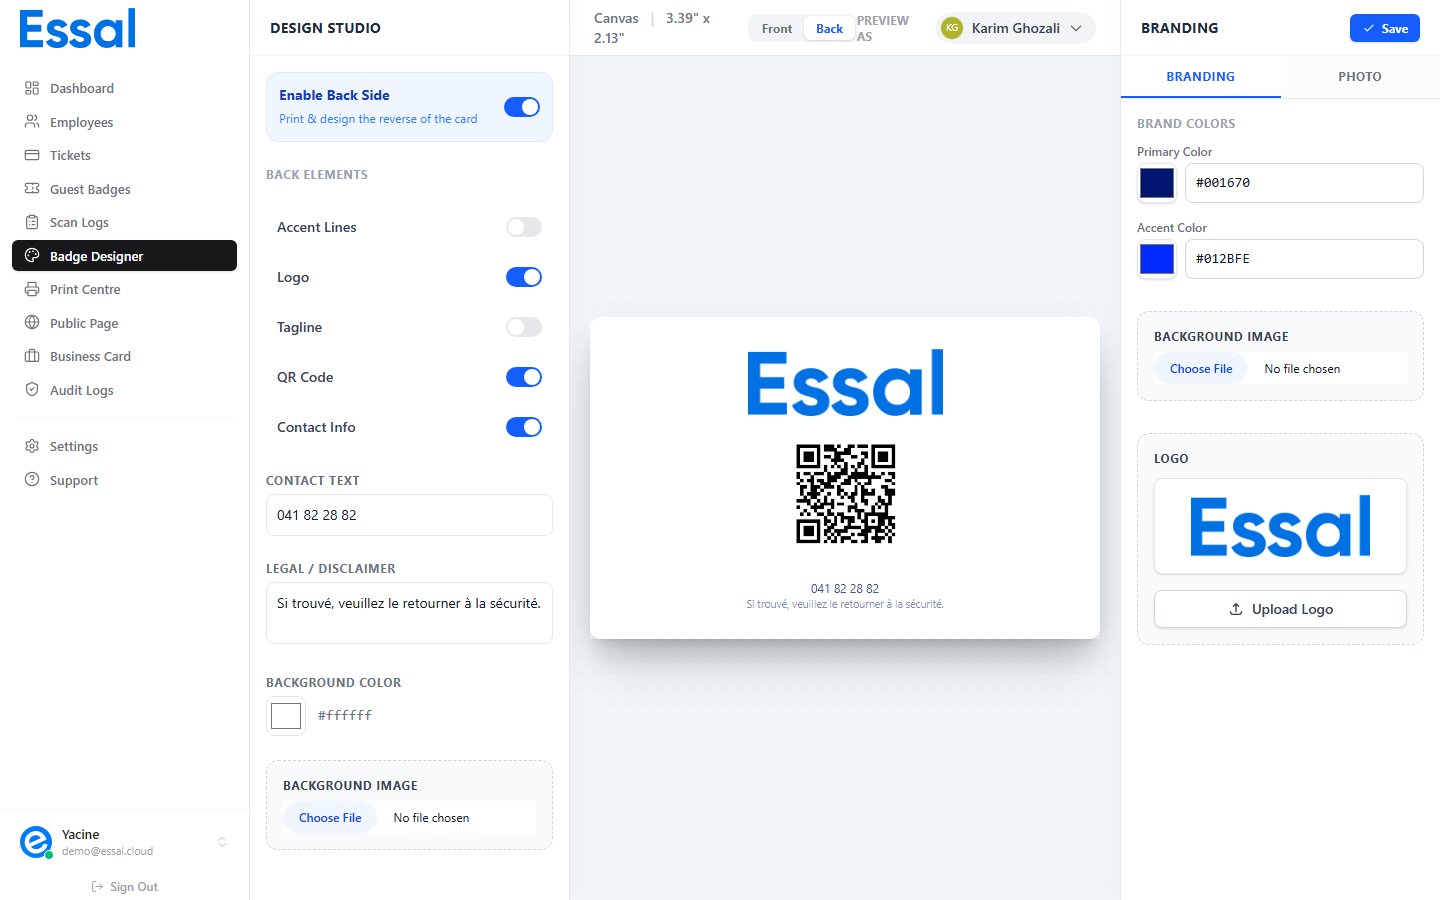
Enabling the Back Side
At the top of the left panel (when Back is selected), the Enable Back Side card is shown. Toggle it on to activate the back side of the badge. When enabled:- The canvas preview switches to show the back face
- The Back Elements section appears in the left panel
- The back side is included when printing (Print Center renders both sides)
Back Side Elements
Five content elements can be toggled on or off for the back face:Contact Text
When Contact Info is enabled, a text input appears:- Enter any contact information you want printed on the back — typically an email address, phone number, or helpdesk URL
- Example:
[email protected] | +1 555 0000 - The text is rendered in a small font near the bottom of the back face
Legal / Disclaimer Text
A Legal / Disclaimer textarea is always visible when the back side is enabled. Use this for:- “If found, please return to Security at [address]”
- A confidentiality notice
- Authorized personnel only statements
- Any compliance-required disclaimer
Background Color
The back side has its own Background Color setting:- Click the color swatch next to Background Color
- Pick a color or enter a hex code
Tip: A light background with your primary color elements works well for formal organizations. A full-color back (using your primary color as the background) creates a bold two-sided look.
Background Image (Back)
You can also upload a background image specific to the back side:- Under Background Image in the left panel (back side controls), click to upload
- Select an image (maximum 2 MB)
- The image renders behind all back content