
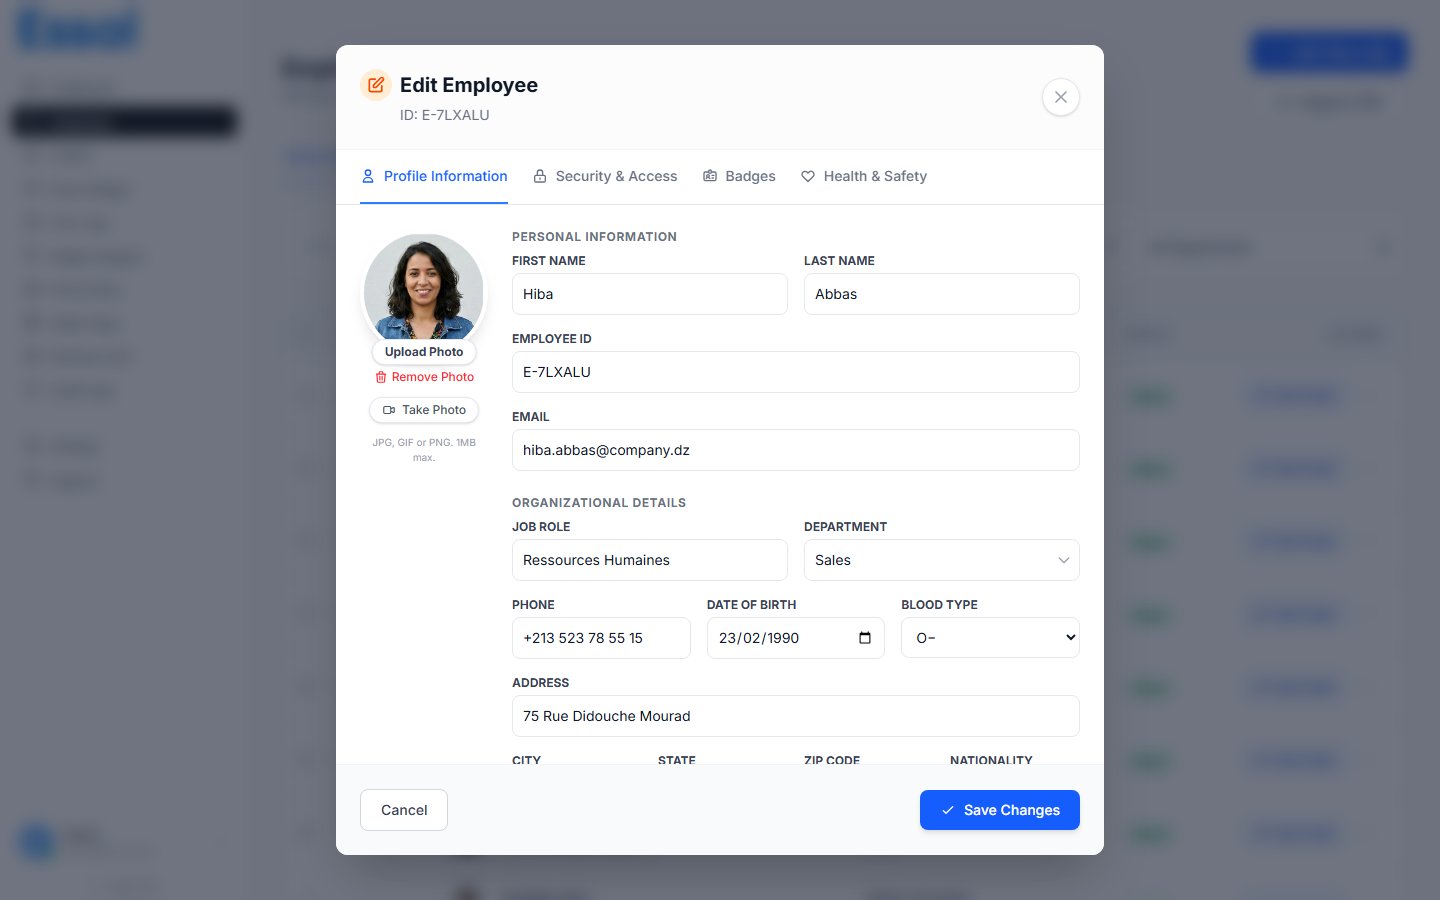
Method 1 — Upload from File
- Click the Upload Photo button below the photo circle, or click directly on the photo circle itself
- A file picker opens — select any image file (JPG, PNG, WEBP, GIF, etc.)
- The photo is uploaded and the circle updates immediately
- Minimum 400×400 px for a clear badge print
- Square crop works best — the badge displays the photo in a circle
- PNG or JPG for web; avoid animated GIFs
AI background removal: If your tenant has the Claid photo enhancement API configured, the background is automatically removed from uploaded photos before they are stored. This gives badges a clean, professional appearance. The enhancement happens silently — you do not need to take any extra steps.
Method 2 — Capture from Webcam
- Click Take Photo below the photo circle
- A full-screen camera view opens with an oval face guide
- Position the employee’s face within the oval
- Click Capture (the large blue circle button) — the video pauses and shows a preview
- Click Use Photo to accept it, or Retake to try again
- The photo is uploaded and saved
Tip: Use the webcam method when employees are present in the office — it is faster than asking people to send photos and ensures consistent framing.
Method 3 — No Photo (Placeholder)
If no photo is uploaded, the badge and profile display a generic avatar placeholder. The employee’s initials or a silhouette icon are shown instead. You can add a photo at any time by editing the employee record — the badge updates immediately when the record is saved.Removing a Photo
When a photo is already uploaded, a Remove Photo link appears in red below the upload button. Click Remove Photo to clear the image. The badge will revert to showing the placeholder avatar. This action takes effect when you click Save.Photo Display on the Badge
The badge template controls whether the photo is displayed and how large it appears:- If photo is enabled in the Badge Designer, it appears in the configured position and size on the badge
- The photo is cropped to a circle on the badge by default (configurable in the designer)
- If photo is disabled in the Badge Designer template, the photo is still stored on the record but not shown on the printed badge