
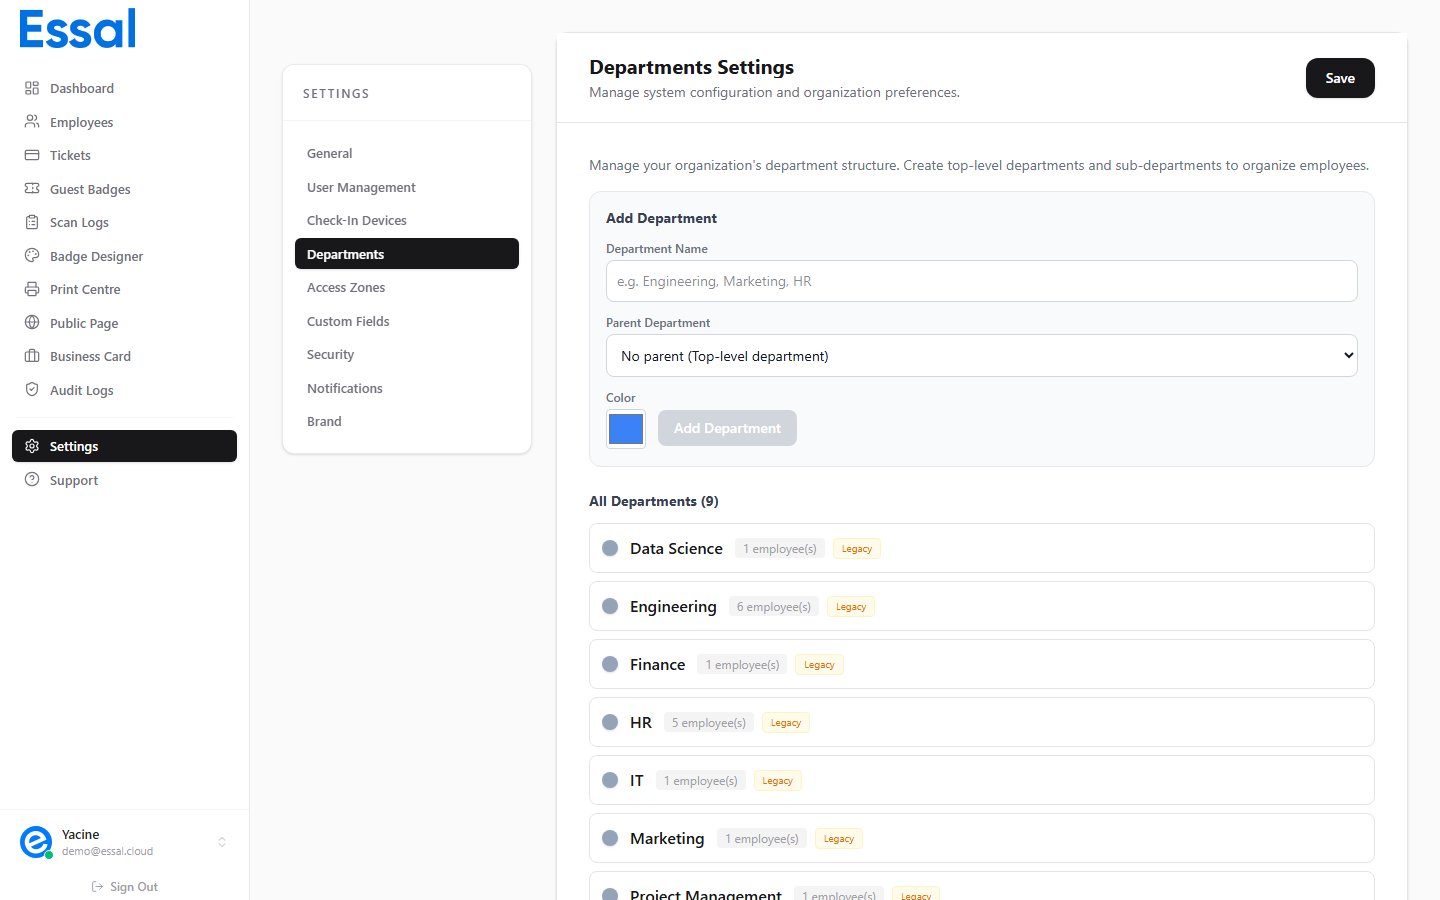
Creating a Department
- In the Departments tab, find the New Department form.
- Enter the Department Name (e.g. Engineering, Human Resources, Operations).
- Optionally set a Parent Department to create a nested structure.
- Optionally choose a Color — used as a visual accent in the employee list and on badges.
- Click Add (or press Enter) to save.
At least one department must exist before you can assign employees to departments when adding or editing records.
Nested Departments (Parent / Child Hierarchy)
You can create sub-departments by setting a Parent Department. This lets you model complex org charts. The full path is shown wherever departments appear — e.g.,Operations > Warehouse > Shipping.
Example hierarchy:
- Operations
- Logistics
- Warehouse
- Receiving
- Shipping
- Facilities
- A department can have only one parent.
- You can nest departments as deeply as needed.
- A department with sub-departments cannot be deleted until all its sub-departments are removed or re-parented first.
Department Colors
Each department can have a color code. The color is used:- As a subtle accent on employee list rows.
- On employee badges (if enabled in the template).
- In department filter chips.
Editing a Department
Click the Edit (pencil) icon next to any department in the list to rename it or change its color. The change applies immediately to all employee records assigned to that department.Deleting a Department
Click the Delete (trash) icon next to a department. You cannot delete a department if:- It has sub-departments — remove or re-parent the sub-departments first.
- Employees are currently assigned to it — reassign those employees to another department first.
Renaming a department updates all employee records with the new name automatically.
Assigning Employees to Departments
Departments are assigned per employee on the Profile tab of the employee modal. Open an employee record, go to the Profile tab, and select the department from the Department dropdown. For bulk assignment, use the CSV import wizard — include aDepartment column in your spreadsheet. See Importing Employees from CSV.