> ## Documentation Index
> Fetch the complete documentation index at: https://support.essal.cloud/llms.txt
> Use this file to discover all available pages before exploring further.
# First-Time Setup Checklist
{/* category: Getting Started */}
This checklist walks you through every step needed to go from a new Essal Access tenant to a fully operational system — with employees, badges, and a working check-in device. Each step links to the full guide for that topic.
***
## Before You Start
You will need:
* Your Essal Access admin credentials (you should have received these by email)
* Your company logo file (PNG or SVG recommended, transparent background)
* A list of employees to add — either typed manually or as a CSV export from your HR system
* At least one device to use as a check-in point (Android tablet, iPad, or desktop browser)
Total estimated time: **30–60 minutes** for a small team (under 50 employees).
***
## The Checklist
| Step | Task | Where |
| ---- | ---------------------------------- | ----------------------- |
| 1 | Set your company name and branding | Settings → General |
| 2 | Create your departments | Settings → Departments |
| 3 | Create your access zones | Settings → Access Zones |
| 4 | Design your badge template | Badge Designer |
| 5 | Add your employees | Employees |
| 6 | Register a check-in device | Check-In Devices |
| 7 | Do a test scan | Check-in app |
Work through the steps in order — later steps build on earlier ones (for example, departments must exist before you can assign employees to them).
***
## Step 1 — Set Your Company Name and Branding
Navigate to **Settings** (sidebar → Settings) and open the **General** tab.
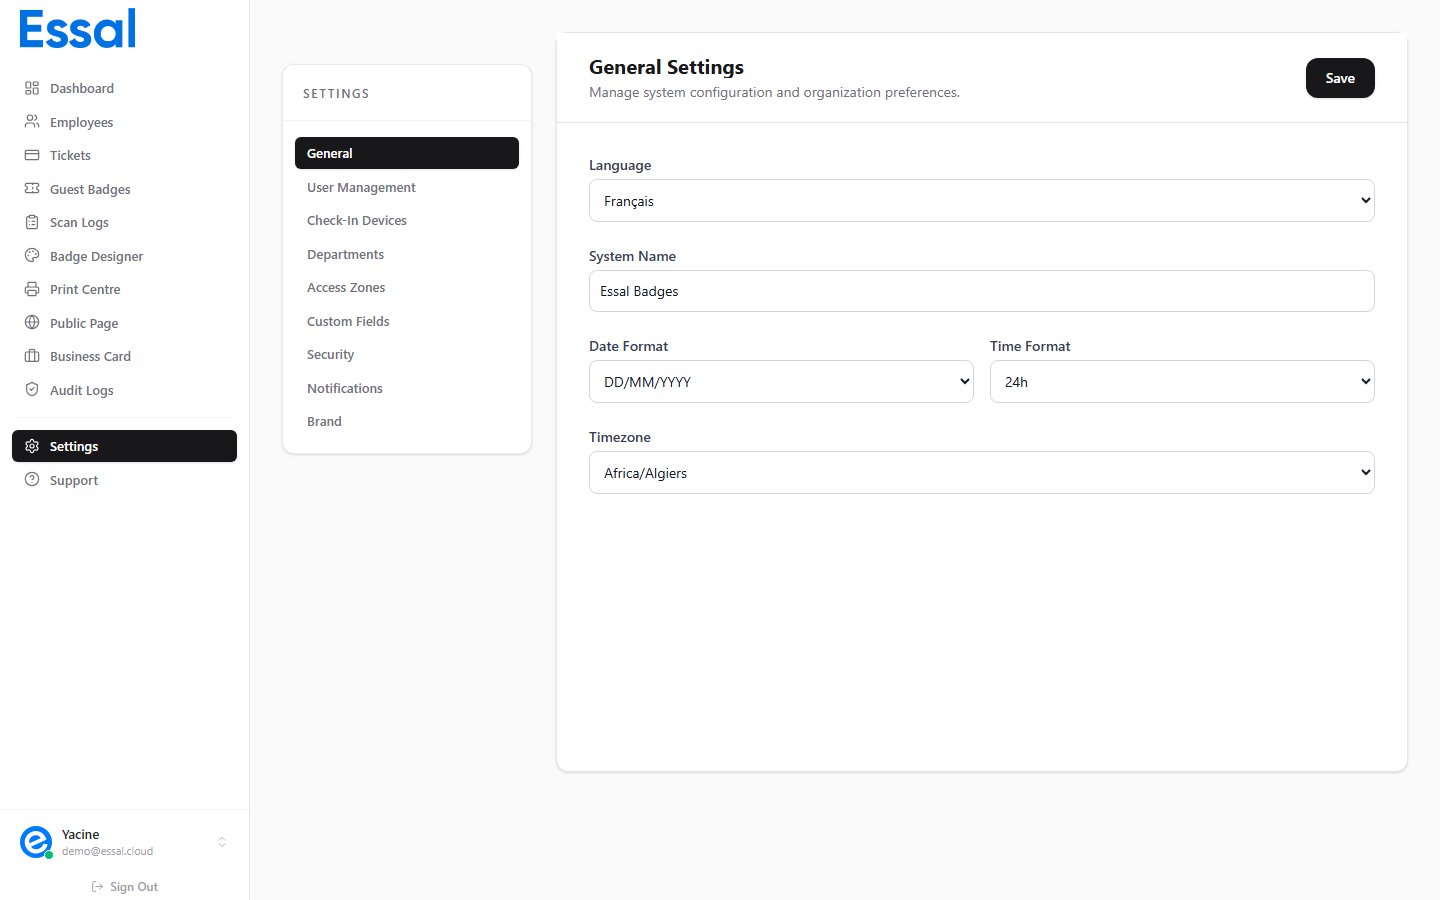 Set the following:
* **Company name** — appears on badges, public profiles, and the employee portal
* **Company logo** — upload your logo file, or use **BrandFetch** to auto-import it by entering your company website URL
* **Primary brand color** — used as the default accent color in badge templates and the check-in app
Save your changes before moving on.
> **BrandFetch shortcut**: If your company has a public website, click **Import from BrandFetch**, enter your domain (e.g. `essal.cloud`), and Essal Access will automatically pull in your name, logo, and color palette.
**Full guide**: Setting Up Your Company Branding
***
## Step 2 — Create Your Departments
Departments group employees for filtering, reporting, and badge display. You need at least one department before adding employees.
Navigate to **Settings → Departments** (or **Employees → Departments** depending on your plan) and create your department structure.
For each department, set:
* **Name** (e.g. *Engineering*, *Operations*, *Front Desk*)
* **Color code** — used to visually distinguish departments in the employee list and on badges
* **Parent department** (optional) — for nested structures like *Engineering > Backend*
You can always add more departments later. A good starting point is your org chart's top-level divisions.
**Full guide**: Managing Departments
***
## Step 3 — Create Your Access Zones
Access zones define the physical areas of your facility (or logical groups) that employees are authorized to enter. When a badge is scanned, the result depends on whether the employee is assigned to the device's zone.
Navigate to **Settings → Access Zones** and create at least one zone for each door or area that will have a check-in device.
For each zone, set:
* **Zone name** (e.g. *Main Entrance*, *Server Room*, *Warehouse*)
* **Description** (optional) — for internal reference
If your facility has only one entry point, a single zone named *Main Entrance* is enough to get started.
**Full guide**: Access Zones — Restricting Where an Employee Can Go
***
## Step 4 — Design Your Badge Template
Essal Access uses one shared badge template — one design applied automatically to every employee record using their individual data.
Navigate to **Badge Designer** (sidebar → Badge Designer).
Set the following:
* **Company name** — appears on badges, public profiles, and the employee portal
* **Company logo** — upload your logo file, or use **BrandFetch** to auto-import it by entering your company website URL
* **Primary brand color** — used as the default accent color in badge templates and the check-in app
Save your changes before moving on.
> **BrandFetch shortcut**: If your company has a public website, click **Import from BrandFetch**, enter your domain (e.g. `essal.cloud`), and Essal Access will automatically pull in your name, logo, and color palette.
**Full guide**: Setting Up Your Company Branding
***
## Step 2 — Create Your Departments
Departments group employees for filtering, reporting, and badge display. You need at least one department before adding employees.
Navigate to **Settings → Departments** (or **Employees → Departments** depending on your plan) and create your department structure.
For each department, set:
* **Name** (e.g. *Engineering*, *Operations*, *Front Desk*)
* **Color code** — used to visually distinguish departments in the employee list and on badges
* **Parent department** (optional) — for nested structures like *Engineering > Backend*
You can always add more departments later. A good starting point is your org chart's top-level divisions.
**Full guide**: Managing Departments
***
## Step 3 — Create Your Access Zones
Access zones define the physical areas of your facility (or logical groups) that employees are authorized to enter. When a badge is scanned, the result depends on whether the employee is assigned to the device's zone.
Navigate to **Settings → Access Zones** and create at least one zone for each door or area that will have a check-in device.
For each zone, set:
* **Zone name** (e.g. *Main Entrance*, *Server Room*, *Warehouse*)
* **Description** (optional) — for internal reference
If your facility has only one entry point, a single zone named *Main Entrance* is enough to get started.
**Full guide**: Access Zones — Restricting Where an Employee Can Go
***
## Step 4 — Design Your Badge Template
Essal Access uses one shared badge template — one design applied automatically to every employee record using their individual data.
Navigate to **Badge Designer** (sidebar → Badge Designer).
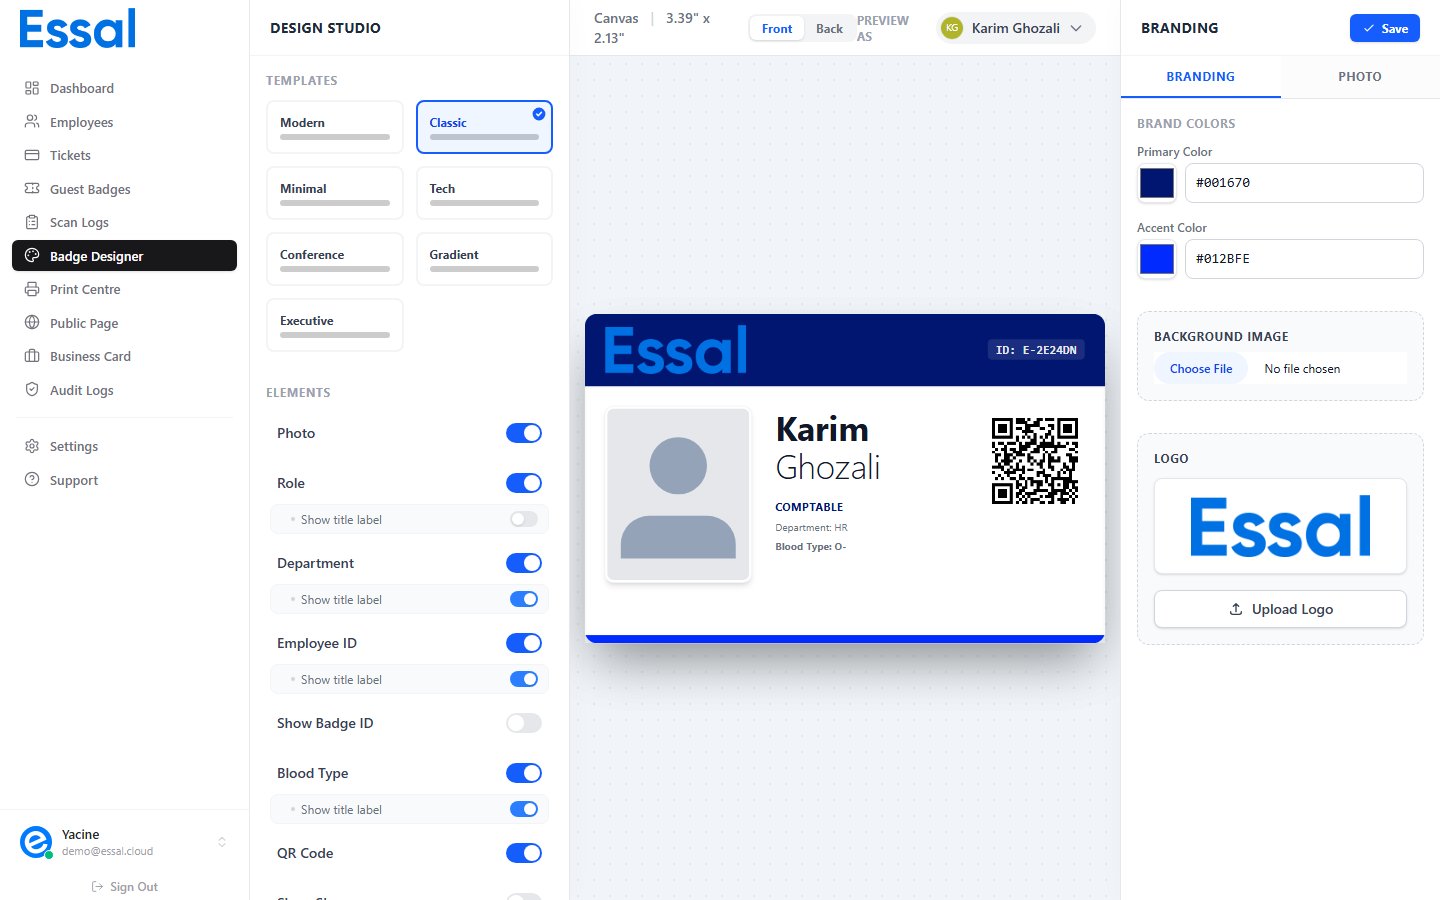 For a first-time setup, work through these in order:
1. **Choose a layout** — select from the 7 built-in layouts (Modern, Corporate, Tech, Conference, Minimal, Gradient, Executive)
2. **Set orientation** — Portrait (CR80 vertical card) or Landscape
3. **Configure colors and fonts** — primary color, accent color, font family
4. **Front of badge** — choose what to display: employee photo, QR code, name, role, department, Employee ID, Badge ID, company logo, etc.
5. **Badge back** (optional) — enable the back side for contact info, legal text, or additional branding
Use the **Preview** selector to see the badge rendered with real employee data before saving.
Your badge design is saved automatically. All employee badges update immediately when you change the template.
**Full guide**: Badge Designer Overview
***
## Step 5 — Add Your Employees
With departments and your badge template ready, you can now add your workforce.
Navigate to **Employees** (sidebar → Employees).
For a first-time setup, work through these in order:
1. **Choose a layout** — select from the 7 built-in layouts (Modern, Corporate, Tech, Conference, Minimal, Gradient, Executive)
2. **Set orientation** — Portrait (CR80 vertical card) or Landscape
3. **Configure colors and fonts** — primary color, accent color, font family
4. **Front of badge** — choose what to display: employee photo, QR code, name, role, department, Employee ID, Badge ID, company logo, etc.
5. **Badge back** (optional) — enable the back side for contact info, legal text, or additional branding
Use the **Preview** selector to see the badge rendered with real employee data before saving.
Your badge design is saved automatically. All employee badges update immediately when you change the template.
**Full guide**: Badge Designer Overview
***
## Step 5 — Add Your Employees
With departments and your badge template ready, you can now add your workforce.
Navigate to **Employees** (sidebar → Employees).
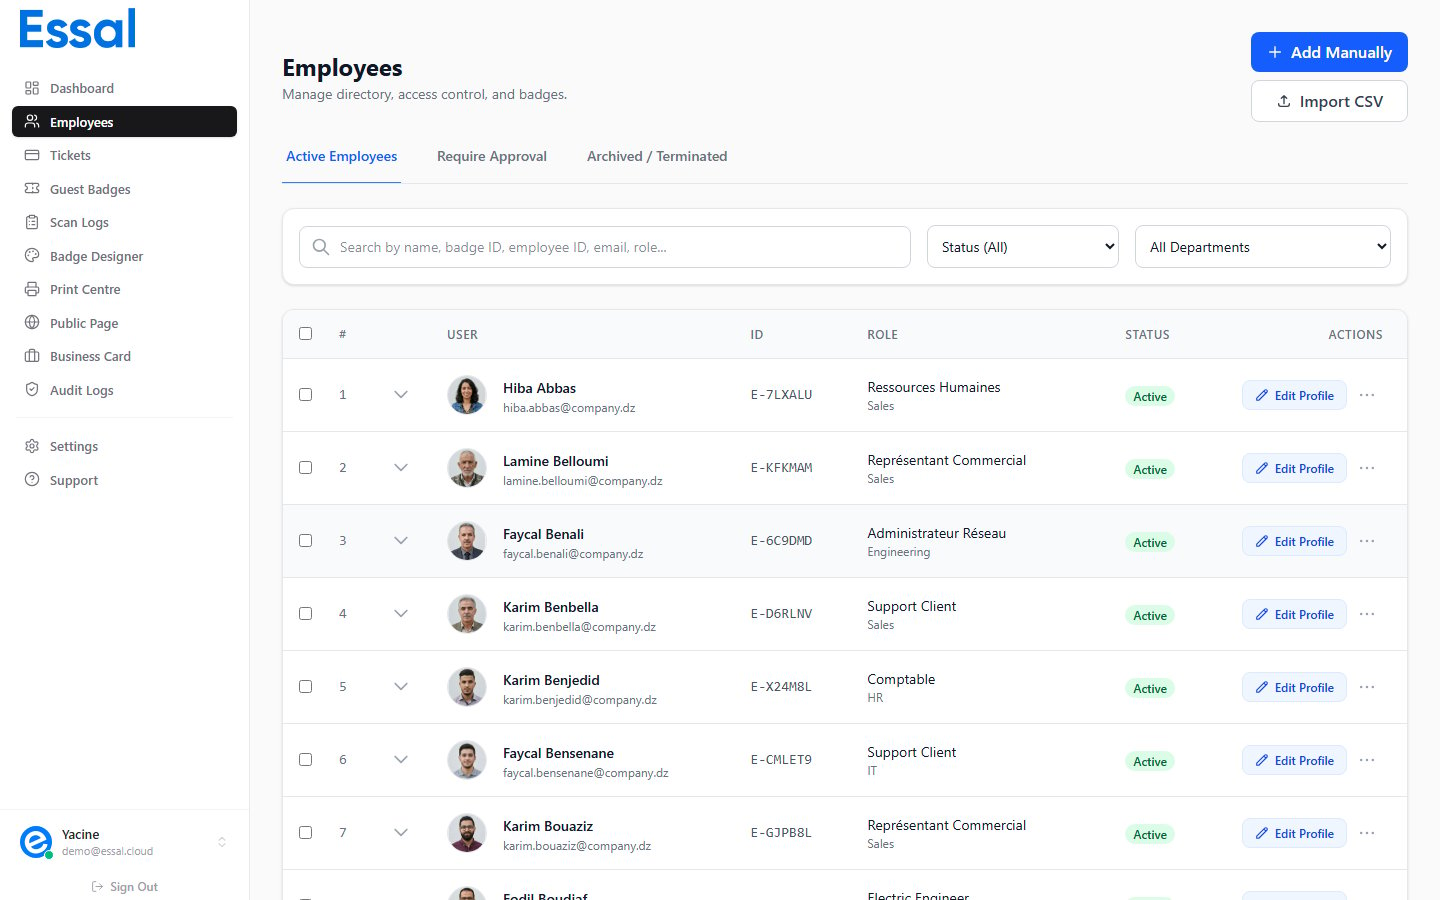 You have two options:
### Add employees one by one
Click **Add Employee**, fill in the profile fields (name, role, department, email, contact info), and save. Repeat for each person.
Best for small teams or individual additions. Each record takes about a minute to complete.
**Full guide**: Adding a New Employee
### Import from CSV
Click **Import** → **Import from CSV** to open the import wizard. Download the template, fill in your employee data, upload the file, and map columns to fields. Essal Access validates your data before committing the import.
Best for teams of 10 or more. A well-prepared spreadsheet takes under 5 minutes to import.
**Full guide**: Importing Employees from CSV
***
## Step 6 — Register a Check-In Device
A check-in device is any tablet, kiosk, or browser running the Essal Access check-in app. You pair it to your tenant using a one-time registration code.
### On the admin side
1. Navigate to **Check-In Devices** (sidebar → Check-In Devices)
You have two options:
### Add employees one by one
Click **Add Employee**, fill in the profile fields (name, role, department, email, contact info), and save. Repeat for each person.
Best for small teams or individual additions. Each record takes about a minute to complete.
**Full guide**: Adding a New Employee
### Import from CSV
Click **Import** → **Import from CSV** to open the import wizard. Download the template, fill in your employee data, upload the file, and map columns to fields. Essal Access validates your data before committing the import.
Best for teams of 10 or more. A well-prepared spreadsheet takes under 5 minutes to import.
**Full guide**: Importing Employees from CSV
***
## Step 6 — Register a Check-In Device
A check-in device is any tablet, kiosk, or browser running the Essal Access check-in app. You pair it to your tenant using a one-time registration code.
### On the admin side
1. Navigate to **Check-In Devices** (sidebar → Check-In Devices)
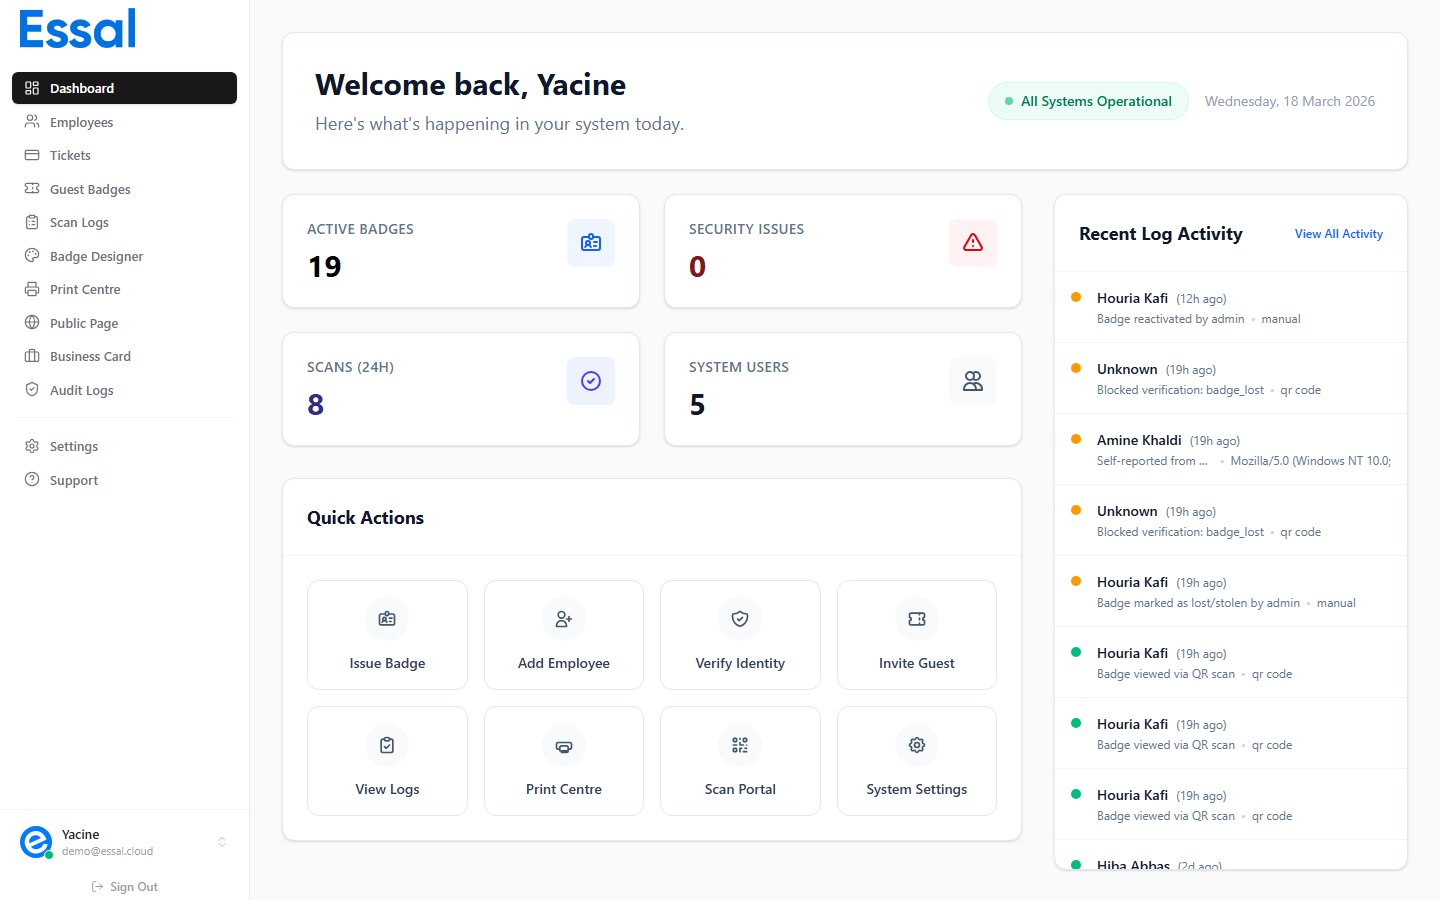 2. Click **Add Device** (or **Generate Code**)
3. Give the device a name (e.g. *Main Entrance Tablet*) and assign it to the access zone you created in Step 3
4. A **6-character registration code** is displayed — it is valid for 15 minutes
### On the device
1. Open [https://checkin.access.essal.cloud](https://checkin.access.essal.cloud) in the browser on the device
2. Enter the 6-character code when prompted
3. The device is registered and ready to use — it will appear as **Active** in your Check-In Devices list
> **Tip**: Use the **Send via Email** option if the device is at a remote location and you cannot enter the code directly.
**Full guide**: Registering a New Check-In Device
***
## Step 7 — Do a Test Scan
With at least one employee added and a device registered, run a quick end-to-end test before going live.
1. Open the **Employee Portal** at [https://portal.access.essal.cloud](https://portal.access.essal.cloud) and sign in as one of your employees (or use your own admin account if it is linked to an employee record)
2. The portal shows the employee's badge with a QR code — tap the QR code to display it full-screen
3. On the check-in device, point the camera at the QR code
4. The device should show a **green Granted screen** with the employee's name, photo, and department
If you see a **Denied** result, check that:
* The employee's status is **Active** (not suspended, pending, or terminated)
* The employee is assigned to the access zone configured on the device
* The device is still connected to the internet
**Full guide**: Understanding Scan Results
2. Click **Add Device** (or **Generate Code**)
3. Give the device a name (e.g. *Main Entrance Tablet*) and assign it to the access zone you created in Step 3
4. A **6-character registration code** is displayed — it is valid for 15 minutes
### On the device
1. Open [https://checkin.access.essal.cloud](https://checkin.access.essal.cloud) in the browser on the device
2. Enter the 6-character code when prompted
3. The device is registered and ready to use — it will appear as **Active** in your Check-In Devices list
> **Tip**: Use the **Send via Email** option if the device is at a remote location and you cannot enter the code directly.
**Full guide**: Registering a New Check-In Device
***
## Step 7 — Do a Test Scan
With at least one employee added and a device registered, run a quick end-to-end test before going live.
1. Open the **Employee Portal** at [https://portal.access.essal.cloud](https://portal.access.essal.cloud) and sign in as one of your employees (or use your own admin account if it is linked to an employee record)
2. The portal shows the employee's badge with a QR code — tap the QR code to display it full-screen
3. On the check-in device, point the camera at the QR code
4. The device should show a **green Granted screen** with the employee's name, photo, and department
If you see a **Denied** result, check that:
* The employee's status is **Active** (not suspended, pending, or terminated)
* The employee is assigned to the access zone configured on the device
* The device is still connected to the internet
**Full guide**: Understanding Scan Results